We have been looking around for new places online to list our shop and items. We are currently on Tophatter, but are not actively listing yet, as you have to build up on this site.
We are also on Listia, Check us out on our widget >>>>>>>>>>>>>>>
And my friends new Art site: www.theartland.com
They are still in Beta right now, but will be rolling out there awesome site in April!
Come check us out and if you are looking for some fresh sites to list on, we recommend all of these!
Monday, February 13, 2012
Tuesday, January 17, 2012
Wonderful giveaway from Sweet Harvey on Etsy

Did I mention that it is GREEN?? (My Favorite color!!)
http://www.keepingitindie.com/create/giveaways/giveaway-retro-leaf-jersey-scarf#comment-684
Stop by and check out this wonderful giveaway and their Etsy shop!
Here >>>>> http://www.etsy.com/shop/sweetharvey
She is also our fellow Teamie on Etsy Team 'The Muses"
Wednesday, January 11, 2012
My Super Easy Orange-Aid Recipe
This 'winter' which has been very mild where we are (50's in January????) it seems that I have made nothing but owl hats (not that I am complaining) but I needed a change from normal 'winter food' (and owls) so we were lucky enough to find some really good oranges at a local store and I had 3 left so I made this drink that is my new favorite. It is yummy and light and so easy to make.
Those of you that don't know, I am a little bit (?) of a natural organic lover so my recipes are as natural and organic as I can muster in our city.
3 organic oranges (seeded)
Reverse Osmosis filtered water (this removes that poisonous flouride and metals) :D
A little bit of Agave Nectar to taste (refined sugar is horrible for you)
(if you can't get Agave Nectar you can use a RAW sugar or Turbinado as a healthier alternative- it doesn't take much)
1/4 teaspoon PINK Sea Salt (this adds trace minerals back into the water)
Wash and Cut two whole oranges and remove seeds (eat these seeds because they are good for you- a little bitter but we all need to eat seeds of all kinds), toss them into the food processor and process until they are finely chopped/pureed. Add contents of food processor to pitcher. Juice last orange either by hand or juicer.
Add this to pitcher. Fill with water and add salt and Agave Nectar to taste.
Stir really well! HERE IS THE TRICKY PART. The longer you let the drink mixture sit, the better it will taste because the orange zest (peel) has more chance to soak into the water. BUT it is great right away and never sits too long at our house :) If you want to strain the orange chunks out- go ahead. I love to keep mine in and chew it up as I drink.
Here is a pic of my drink from yesterday... YUMMY! and its GOOD for you!

You can see the chunks of orange at the bottom.... MMMmmmMMM
Enjoy!
Saturday, December 10, 2011
Check out this Giveaway on FaveCraft
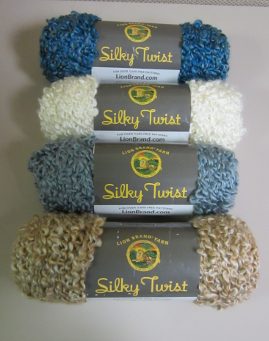
Favecraft is hosting a giveaway of Lion Brand Yarn.
You can enter here: http://www.favecrafts.com/sweeps/Lion-Brand-Silky-Twist-Yarn-Giveaway/ml/1
Favecraft is one of my favorite websites for inspiration and crafty ideas. Come check them out!
Hope everyone is having a great Holiday Season so far!
We have been so busy!
Happy Capatiller is also now on Pinterest! Come follow us!
http://pinterest.com/happycapatiller/
This site is Awesome to find the Best of the Web! If you want an invite~ just ask us!
XX
Tara
Saturday, November 19, 2011
Our New Yarn Website
If anyone wants to buy great yarn at great discounts- come check us out!

This Green Baby Alpaca Merino is $2.03 each sold in lots of 8!
From 0..62 cents a ball/skein and up!
http://happycapatiller.yarnshopping.com/
This Green Baby Alpaca Merino is $2.03 each sold in lots of 8!
From 0..62 cents a ball/skein and up!
http://happycapatiller.yarnshopping.com/
Remembering to Breathe
This time of year is so busy. I have not had time to do anything it seems. When I do, I sit here staring at the wall overwhelmed. We have 2 shows coming up and trying to increase inventory for this season plus I have my 5 month old... then I sit back and remember... it is really retail corporations that have robbed us all of this time of year. So Don't forget to breathe! I hope to be posting more soon... But I am really not a big talker.. .unless you want to talk about our shop, or art, or natural organic foods and products... health care instead of sick care like we have here in the U.S.... or babies, spit-up and drool.... the Bible or enjoying the outdoors. But poetic I am NOT... And most things, I just don't have a lot to say about ... that really need to be said anyway.
But I guess things gotta change- so I am going to be working on this. Maybe enlisting the help of Tori (my daughter) who is not usually short on words or subjects.
So here is to continuing to breathe while the whole world is going crazy in debt and speeding by this time of year
XX
Tara
But I guess things gotta change- so I am going to be working on this. Maybe enlisting the help of Tori (my daughter) who is not usually short on words or subjects.
So here is to continuing to breathe while the whole world is going crazy in debt and speeding by this time of year
XX
Tara
Monday, October 31, 2011
Photo Book
Click here to view this photo book larger
Shutterfly offers exclusive photobook layouts so you can make your book just the way you want.
Friday, October 28, 2011
The Cashmere Saga - My Creative Process with Vintage


So what I usually end up doing is staring at something for quite a while... sometimes weeks... I will put different colors by it, different materials... who knows... until I find the hidden match- the relationship whether that of contrasts or compliments...
BUT... if anyone has any ideas for me- I'm all ears!
Share with us your creative process- We would love to hear it!!
XX
Tara
Saturday, October 15, 2011
Make a Dress Form to Design or for Photographs - Duct Tape Mannequin

We are in the process of creating a new homemade dress form for our shop use and displays and wanted to share the process with you.
These can sell in stores for a few hundred bucks and used are still more than what we paid.
This is good for any shop that makes anything that a person can wear, Jewelry, or vintage or accessories...
Many of you may have store bought dress forms, but if you are like me, if you actually made a dress on it, it wouldn't be fitted to YOU. Plus we like the look of it for displays and photography and looks cleaner and displays jewelry and scarves and neckwear very well.
These dress forms, once complete can be painted, covered with fabric and changed as needed. A very functional tool and photo prop we made for the cost of 3 rolls of duct tape. It only took a few hours to make (we still have to paint or fabric cover it).
It can be mounted as you like from things lying around your house fairly easily.
There are some Youtube videos showing how to make them also and I will post those links for visuals as well.
Here is how we did it.
Supplies:
3 rolls plain duct tape
1 old mop or broom handle or similar
couple scrap pieces of 2x4 lumber
1 old long tshirt
old towels or sheets or whatever for stuffing
Hammer and few nails
1. I wrapped my daughter in duct tape from her neck to her lower hips. Be careful that the neck and entire area to be wrapped is covered with the old t-shirt first. You may need to wrap neck with a scrap fabric.
HINT: Make sure you pay attention to how the duct tape forms to the body. For some curves it may be too wide or too long.
You need to cover torso with 3 layers in contrasting directions. First layer horizontally, second layer vertically, and third horizontally.
2. Cut fully wrapped duct taped t-shirt off from the back being very careful how you cut and not to cut any underwear. This cut will form a vertical 'seam' in the back of the form.
3. Once form is off, carefully line up back seam and re-tape.
4. Tape over top of neck. Place a large piece of whatever you are stuffing form with in neck and shoulders. Make sure when you pack form, you pack it well so its not too soft or flimsy.
5. Prepare your stand (I asked my husband to do this part, he was having fun playing with power tools ;) We sawed an old broom handle, drilled a hole large enough for handle to be mounted into wood base.(The depth needed for this hole depends on height you want form and weight of form itself. My form would be heavier than my daughter's because she is tiny and I would need more stuffing :P
For the base we used a couple old 1x8 trim pieces that are true 1 inch thick and drilled mostly through both. We placed two trim pieces on either end for more stability, that are slightly wider. You can glue in handle to base or maybe even use a little craft cement around hole to hold form stronger.
6. Place form onto handle. Top of handle should go into neck (already stuffed neck) and then finish stuffing form. (it is okay to lay it down to stuff as you will be able to shape it just before finishing. Make sure form is stuffed stiffly. And be careful to stuff around the mounting post (broom handle) so the post is centered. We used old towels and an old blanket and sheet (too bad to use for anything else)
7. Once you have stuffed around the post and have filled it FULL, place duct tape over bottom until it is fully covered and over bottom of arm holes. Tape form to post also, as this keeps form from spinning on you when you use it.
8. Now you can 'sculpt' your form. You want to make sure that its even and "filled out" in all the right parts. Make sure the duct tape is laying flat and not wrinkled. This may take some work, but take your time.
9. Once your duct tape is smooth and form is shaped how you want it, you can paint it, paper mache' it, or fabric cover it.
Then its ready to use for dress or clothing making or to display your items.
Here is a Youtube link - there are others. http://www.youtube.com/watch?v=wsXOxxZhBbI
I think we are going to paper mache' then paint ours.
Then I will just have to go fix some of my pics at my shop :)
Enjoy! and if you have any questions or want to know more specifics about how we did it, feel free to ask!
Tara
HappyCapatiller

Monday, September 19, 2011


Subscribe to:
Posts (Atom)